Or more accurately, “Intuiting How to Make a Half Hull Model by Trial and Error with Mostly Old-World Guitar Making Tools.” I make no claims that this is the best or remotely correct way to make one, but it’s what I did nonetheless, despite my lack of prior knowledge or research. Sometimes I just get an itch.
Val and Martina of Providence II have kept our boat going in a lot of ways. The first time I met Val was when our trailer roller disintigrated and I randomly showed up at Cedar Creek in need of a hacksaw. Without even knowing us, he helped me cut the old axle off and install a new one. Since then, they’ve mended our sails, fed us when we showed up with stupid food at raftups, given us lots of good advice and ideas for places to sail, and even let us store Fortuitous at their house during a hurricane. There’s really no way that we can repay them in kind.
But I have been known to kick out a nicknack every now and then. A half hull model is traditionally a boatbuilder’s tool. Before computer-aided drafting, scale models were built to visualize and refine the complex curves that make up a ship’s hull and served as a template for making the actual ships. Modeling only half of the hull ensured symmetry. They’re largely decorative these days, but to a serious boater I think they have a kind of built-in nostalgia, and I decided to try make one of Providence II for our boating friends.
Here’s how I did it (click to enlarge photos):
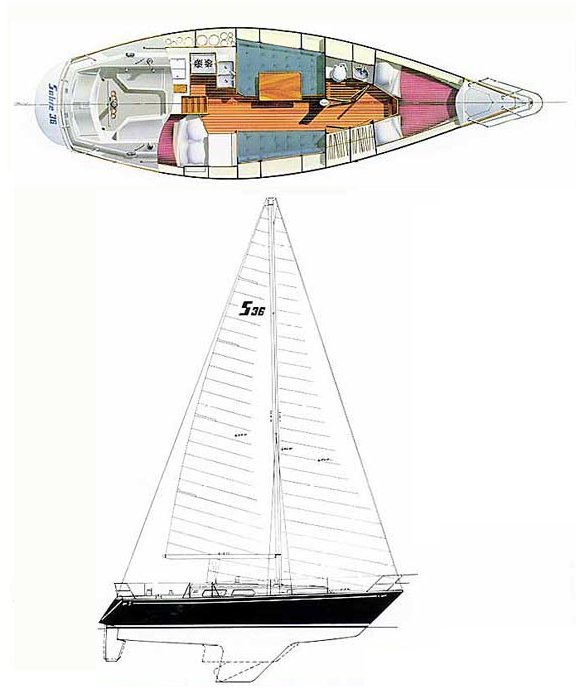
Step 1: Try to find a set of line drawings. I couldn’t find the actual lines plan for a Sabre 36 Centerboard with the hull curves, so right of the bat I knew this was only going to be an approximation, but I did find a small, low-resolution drawing of the interior layout and the rigging plan. I supplemented that with some pictures of the actual Providence II and other Sabre 36s from the classifieds.
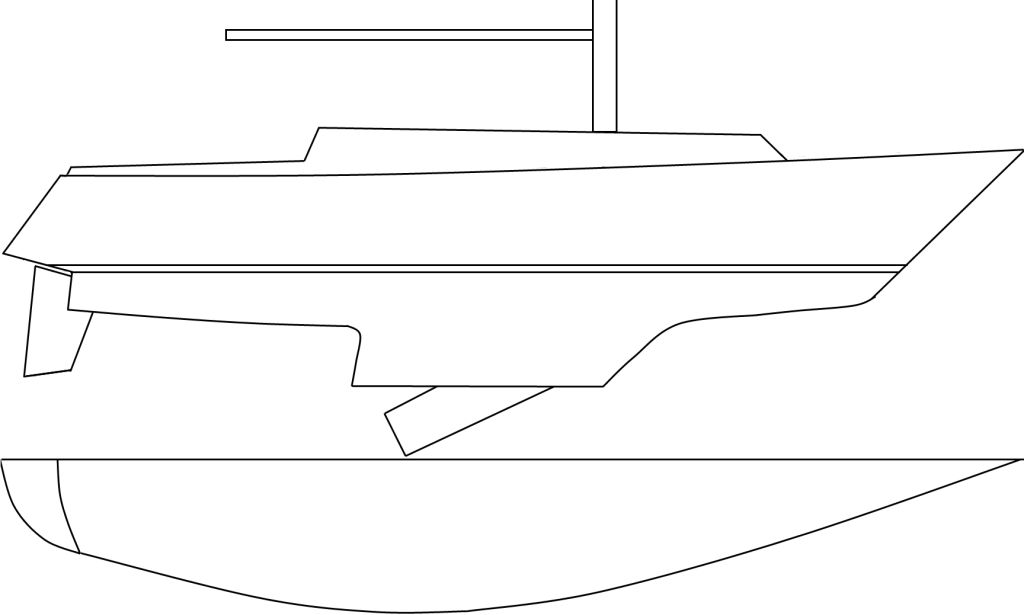
Step 2: Make a pattern. I scaled up the not-quite line drawings to the size of the actual model and traced curves over them to the best of my ability. I printed out several copies.
Step 3: Prep the wood. I chose basswood for the bulk of the hull, with a walnut boot stripe. I measured how much boat I’d need on either side of the waterline and cut some basswood to the approximate size. The pieces were too big to cut with my bandsaw, so I used my ryoba (a double sided Japanese hand saw). I then planed the mating surfaces with a sharp bench plane to make sure that they were really flat, and glued up a sandwich.
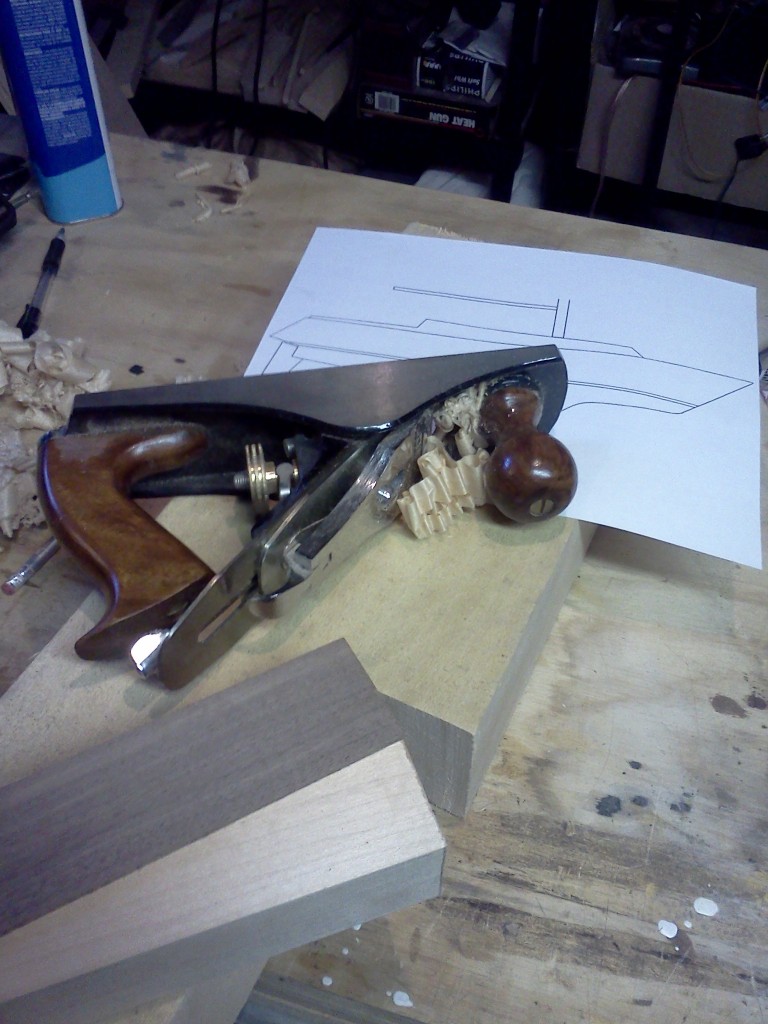
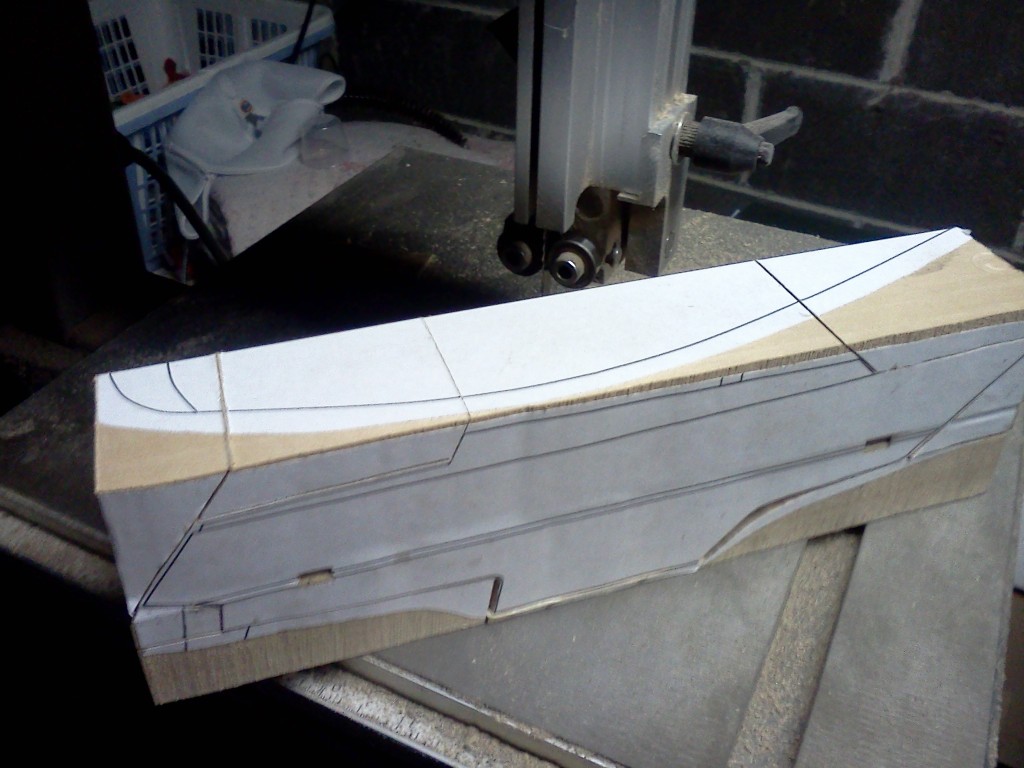
Step 4: Cut out the profile. When the blank was dry I did some more planing to get the outside square. This made it reasonably likely that when I got to the bandsaw I wouldn’t be introducing any weird angles as I cut out the parts. I first cut out the “side view” in as few cuts as possible to leave the negative space intact.

Step 5: Once the side view was cut out, I used double-sided tape to tape all the cutouts back in. I then had a basically rectangular block of wood again, and was able to cut out the “top view.” Taking a couple passes like this greatly reduced the amount of eyeballing that I had to do later and got me pretty close to my plans.
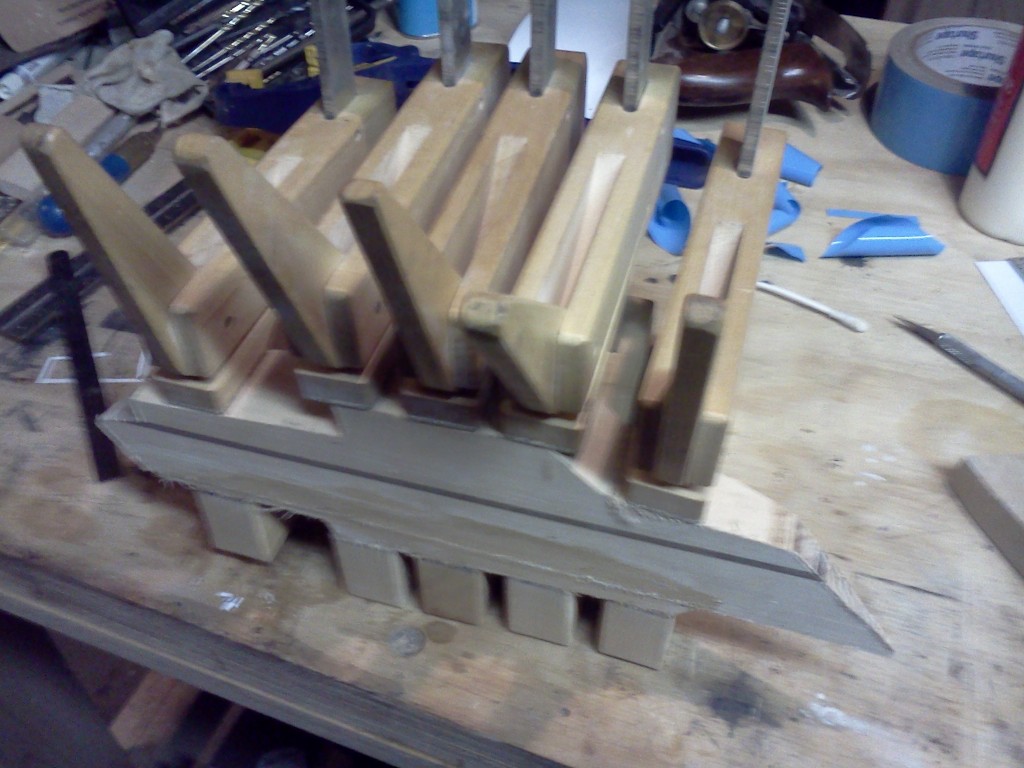
Step 6: Make the cabin top. I’m not really sure how I feel about this step. It may be a significant departure from the way these are “supposed” to be made, but I was concerned that I’d never be able to accurately carve the angle between the cabin top and the side deck. I chose to instead cut the cabin top clean off, trim off the area that would become the side deck, then glue the remaining chunk back on to the hull.
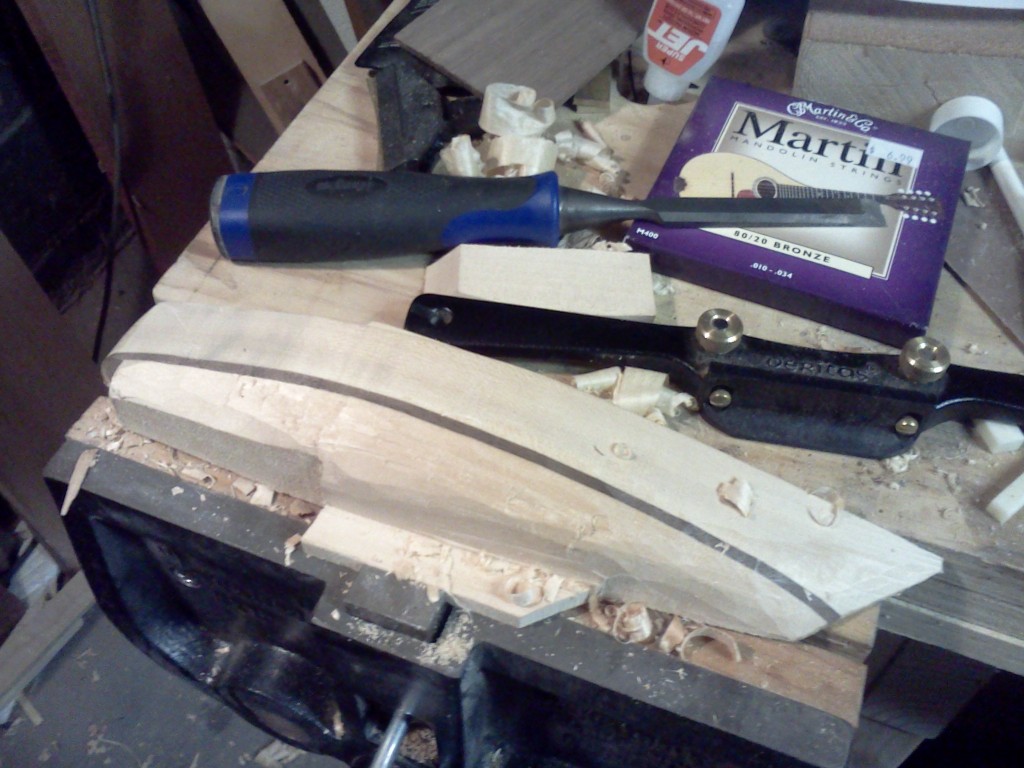
Step 7: Carve. I used a really nice low-angle spokeshave and a really average (though well-honed) chisel to shape the hull. Since I didn’t have the official curves I had to do a lot estimating in this step, but I printed out some of the pictures that I found online and left them on my bench as a guide, especially for creating the stern. Like carving a guitar neck, this is surprisingly relaxing and not as stressful as it may seem.
Step 8: Sand and make other tidbits. I ripped some 1/8″ basswood to make the rudder and centerboard. I thought it would look more convincing if they were separate pieces from the rest of the hull. I then sanded everything with successive grits from 80 to 320.
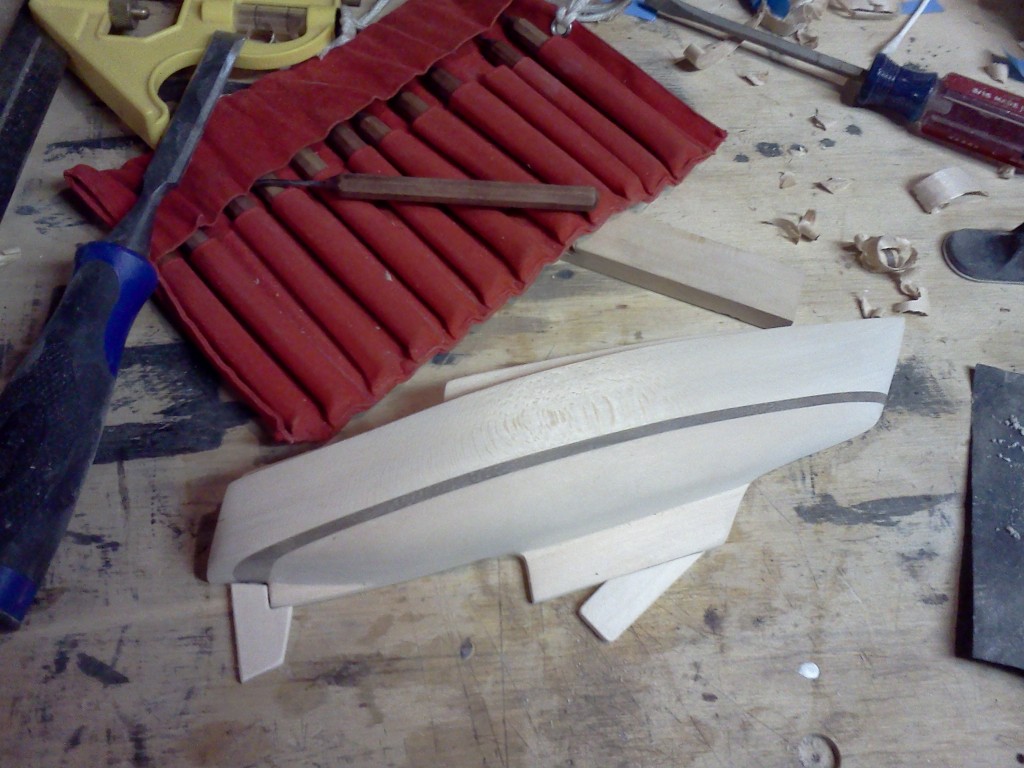
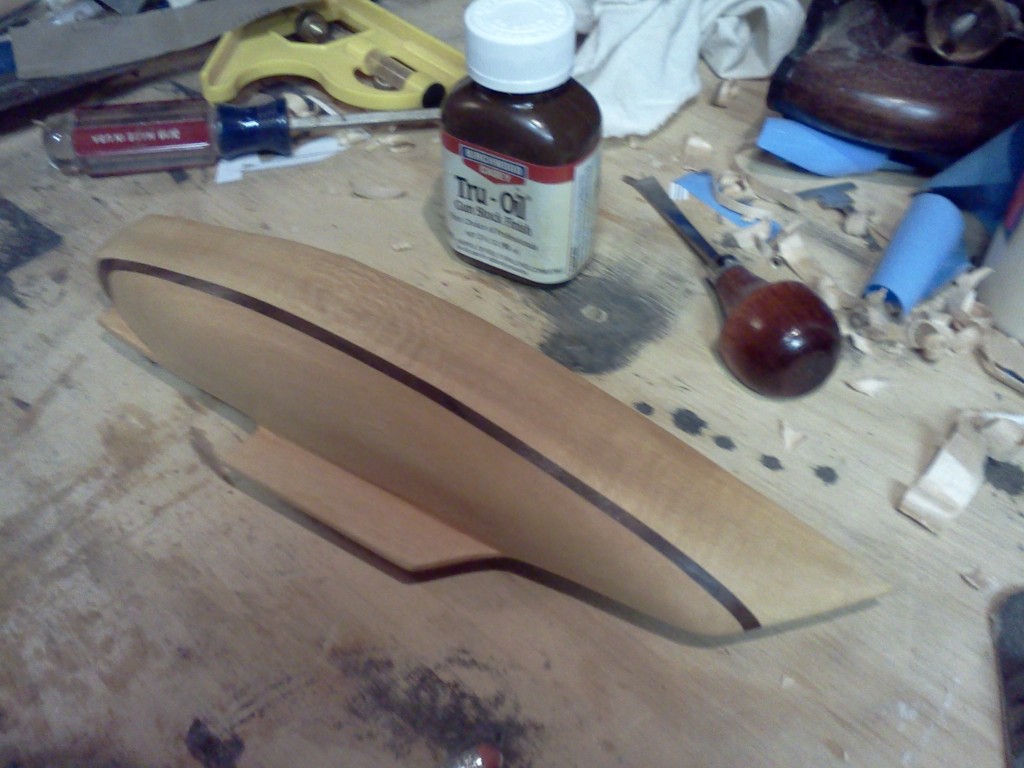
Step 9: Apply hull color. This is another step I’m not sure I’d repeat if I did this again, but my guitar making process took over and I hit the raw wood with some Birchwood Casey Tru-Oil. This is designed as a gunstock finish, but it’s my guitar finish of choice for its ease of use and impossibly thin coating. In this case, it was just to give the basswood a bit of amber color and to make the very subtle grain stand out—a single coat of Tru-oil is almost completely absorbed and it helps to bring out any chatoyance in the wood.
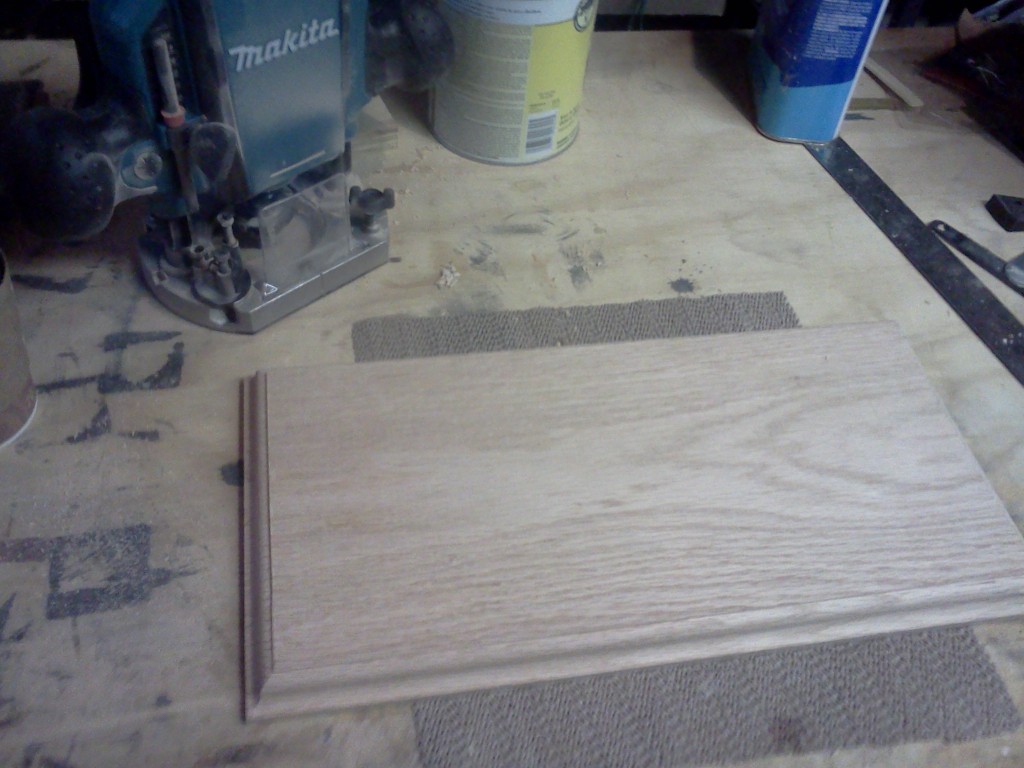
Step 10: Build the backboard. Perhaps surprisingly, this was one of the more difficult parts of the build. There are few 90° angles on a guitar, and what would probably take a few minutes for a carpenter to knock out was extremely nerve-wracking for me. I tried my best to get it square and route a tidy ogee around the outside, but close inspection would show that it’s far from perfect.
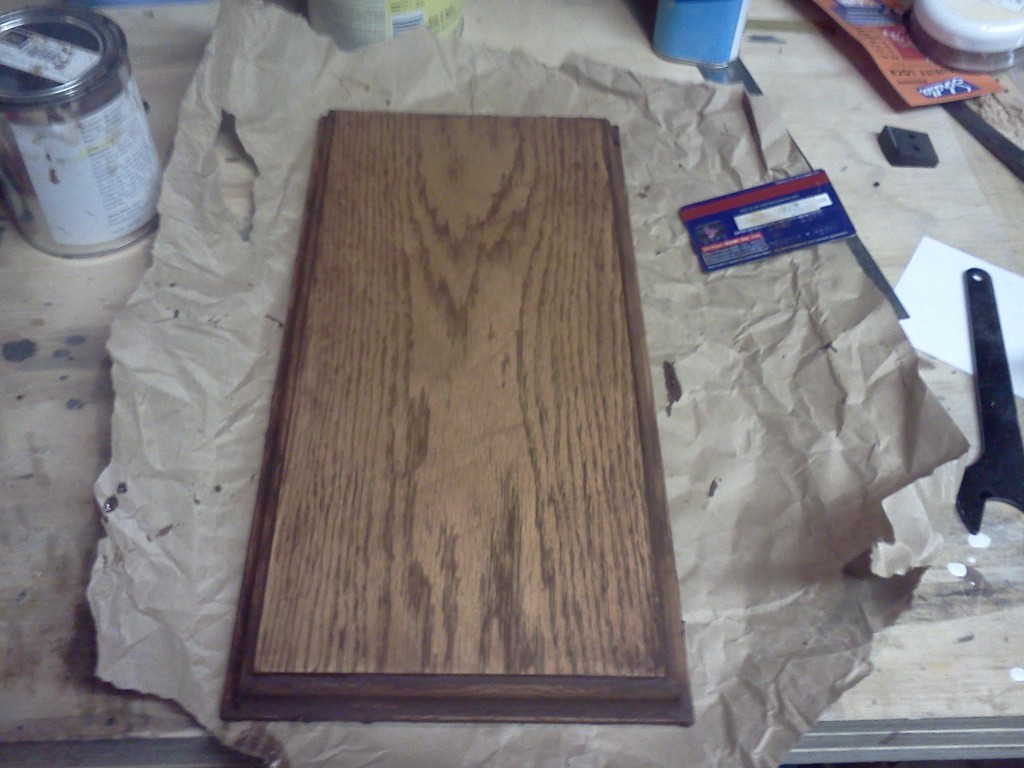
Step 11: Pore Fill. I filled the pores on the oak plaque with McFadden’s mahogany filler (sadly, they’re now out of business), putting a credit card to good use as a squeegee. When it dried, I buffed it with burlap to remove the excess from the surface.
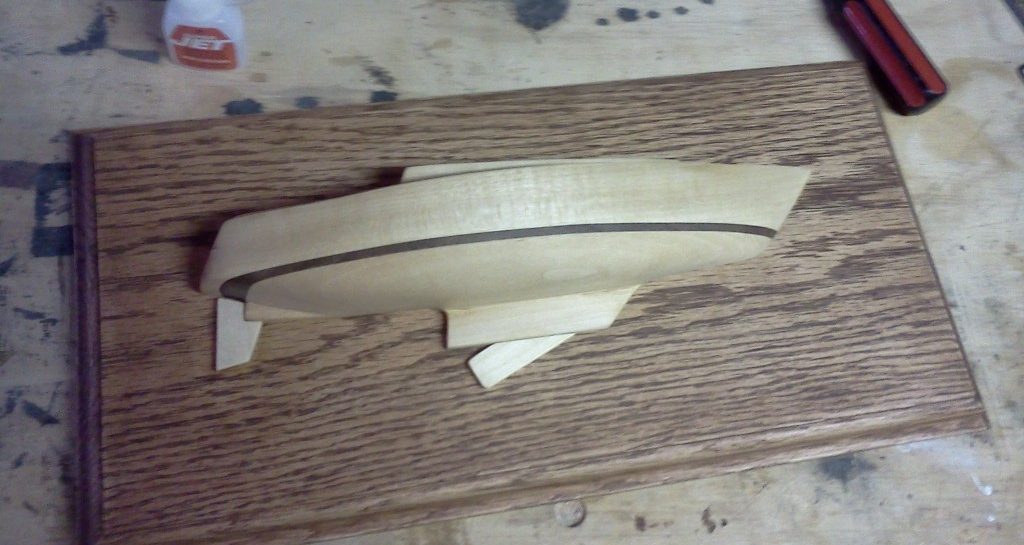
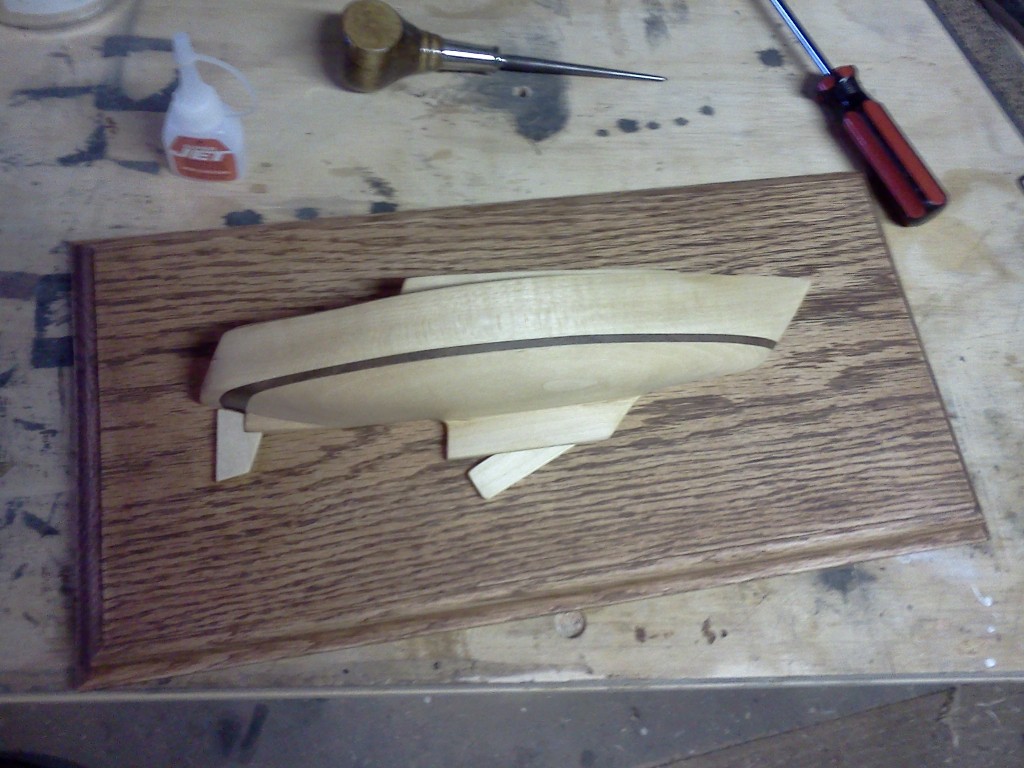
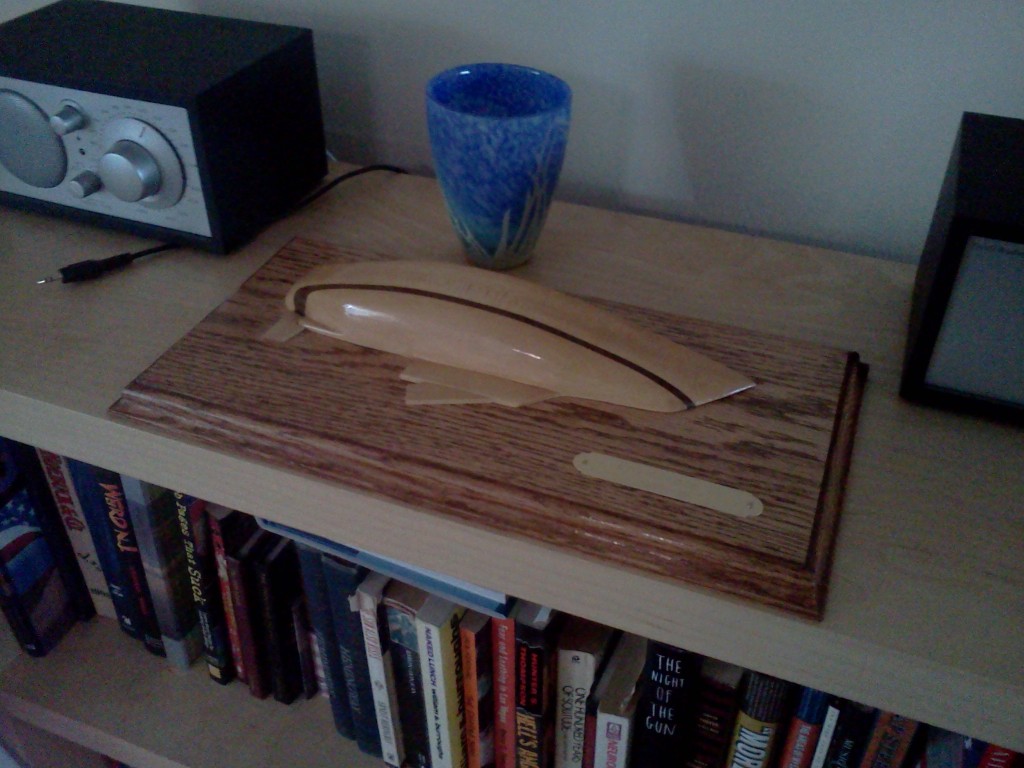
Step 12: Apply approximately 780 coats of shellac (I may be exaggerating), sanding between each coat with fine wet/dry sandpapers from 400 to 2000 grit lubricated with mineral spirits. Initially, I tried to finish the boat on the plaque, but this was a nightmare. Even very light coats, padded on with a cloth in the style of French polish, I’d wind up with a little meniscus where the hull met the backboard. Eventually I removed it and finished them separately, which worked much better. The picture here is actually the test fitting with the boat “in the white” before any shellac was applied.
Step 13: Assemble. That’s pretty much it. Once I got the finish right, I added the hanging hardware, attached the boat, glued on the rudder and centerboard, and nailed in the little brass plate that I had engraved with the boat’s name and model. I then waxed the whole thing for a little gloss management and protection.
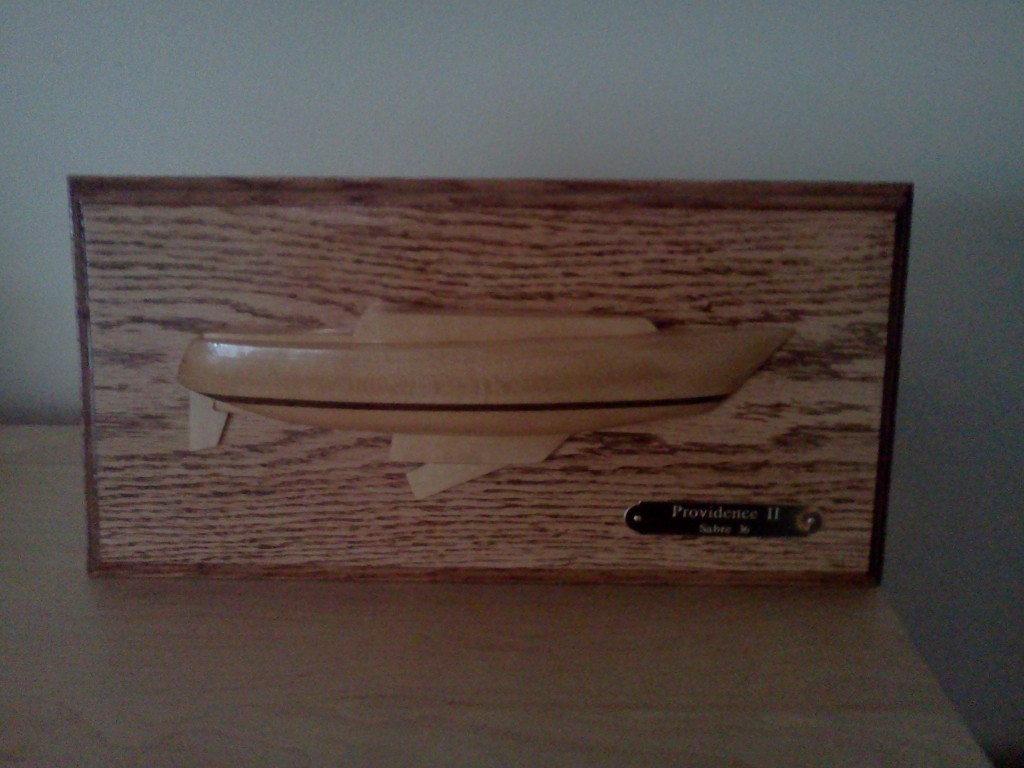
These pictures are all from my cell phone and are pretty junky, but I think the model came out ok. This was certainly a fun winter project that could be accomplished in less than a week, depending on your finishing schedule. I think Jen is already hoping that I’ll make a Fortuitous half hull.
We were able to present it earlier today while on a trip to the Tuckerton Seaport & Baymen’s Museum (with free tickets that we got from Val and Martina, of course), so thanks again Providence II.
UPDATE: Also check out the second half hull that I made of Fortuitous: /fortuitous_half_hull
Wow, Chip…you made it look like I could do it, and I can barely operate a drill.
Yeah man, give it a try. The carving part is probably what would scare most people, but if you do the bandsaw > tape chunks back in > bandsaw in other dimension, you’re most of the way there before you ever have to touch it it with a spokeshave and chisel. It’s pretty cathartic when it’s going well. If you just cut away all the stuff that isn’t boat, what you’re left will will certainly have to be boat.
I should add that I don’t use cheesy tape when taping the blocks back in. I personally only use the double sided tape that StewMac sells:
http://www.stewmac.com/shop/Glues,_adhesives/Tape/Double-stick_Tape.html?actn=100101&xst=3&xsr=455
I’m sure there are cheaper alternatives, but the price per foot on that is actually a lot better than something like double sided duct tape, it holds way better than double sided cellophane tape, and it leaves less residue than carpet tape.