We took a break from sailing this weekend, but not from sailing things. I decided to try my hand at sail making. Kind of.
This has been the wettest June in the Philadelphia region since they started keeping score in 1872. We received a total of 10.11 inches of rain, breaking the previous record of 10.06 inches set in 1938. There were thunderstorms for five days in a row leading into the weekend, and with a 50/50 chance of more on Saturday and even longer odds on Sunday, we decided to skip sailing and tend to some things around the house—between the monsoons and my general inattentiveness, the yard had gotten away from me. It was well beyond the usual meadow look and was starting to move more toward jungle, complete with creeping vines and some kind of fern-like tree (mimosa?) growing seemingly feet per day. I went after the whole yard with a brush saw and my assortment of feeble electric lawn tending implements.
The lack of sailing gets to me though, and I decided to take on a project that I’ve been thinking about for a long time: an anchor riding sail. You’d think that a boat at anchor would be blown backward by the wind and just stick there, but some boats tend to meander at anchor. Our boat oscillates pretty badly, sometimes swinging out 30 or 40° to either side of the wind. This is annoying, especially in a crowded anchorage when we’re swinging more than other boats and often out of phase, and it makes life harder for our anchor since it’s being pulled in several directions. It hasn’t yet caused any actual problems, but I’ve always wanted to experiment with something called an anchor riding sail, which is a small sail flown off of the backstay to stabilize the boat.
Of course, I don’t actually know to make sails, or even sew for that matter. I certainly wouldn’t claim that this is the correct way to do it, but I’m classifying this as “experimental” and I think it will be close enough for a proof of concept.
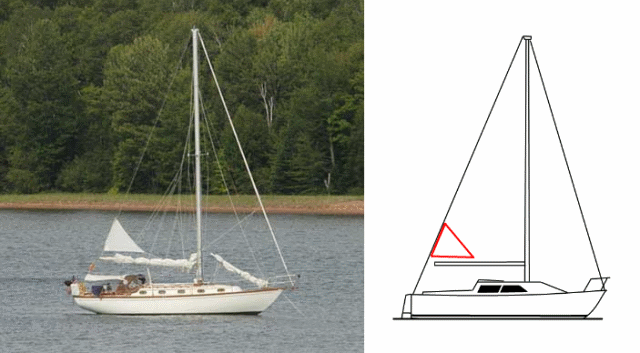
Problem 1: How big is a riding sail? Good Old Boat has a popular article on the subject, and they say that it would be about the same size as a storm jib, or 5 to 10% of the total sail area. I’ve never heard of anyone using a storm jib on a Catalina 22 and I don’t think there’s a standard size, and I feel like I needed more dimensions beyond area. I wound up finding a photo of a boat with a riding sail and then superimposed a line drawing of my boat. I drew a sail of proportionately the same size and then used known measurements in my line drawing to figure out the ratio of pixels to inches (actually feet and tenths of feet, which is obnoxious). I doubt this is mathematically correct, but it was a starting place.
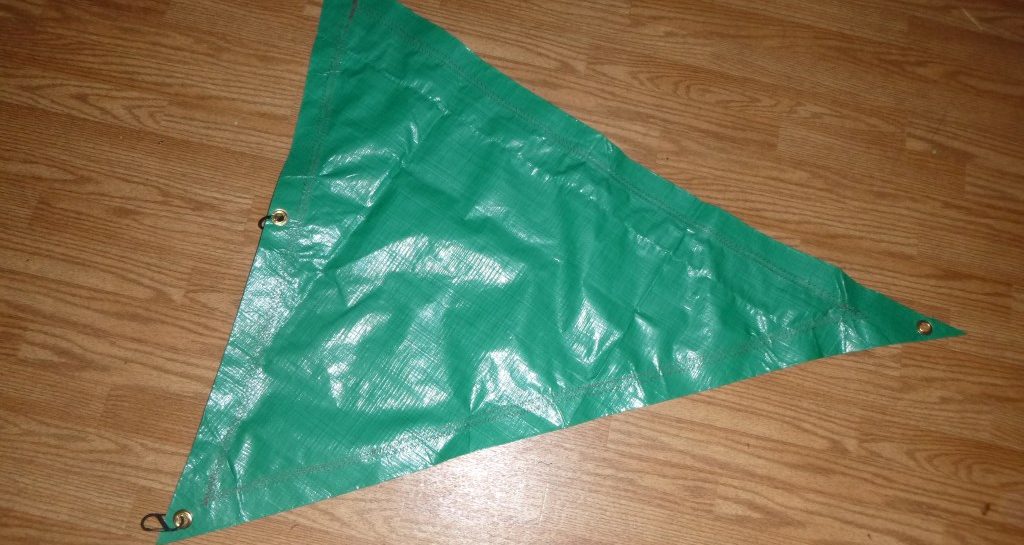
Problem 2: Sail materials. I’ve been looking for a [free] blown out sail for years to make this, but I finally realized that it doesn’t really need to be sail cloth. For one thing, “real” sails are made out of panels that are cut specifically to introduce a curve into the fabric. Blown out sails often have more shape since they’ve stretched a bit over the years. The literature on riding sails says that they should be dead flat, without any curvature built in, which is much easier for a novice to pull off and I think means that I could make it out of any old thing. I took a trip down to my local Garbage Tool Store and bought a $3.79 tarp. I’m not sure that this material is ideal, but it’s been done before on far more critical sails, and at this price point I’m willing to give it a go.
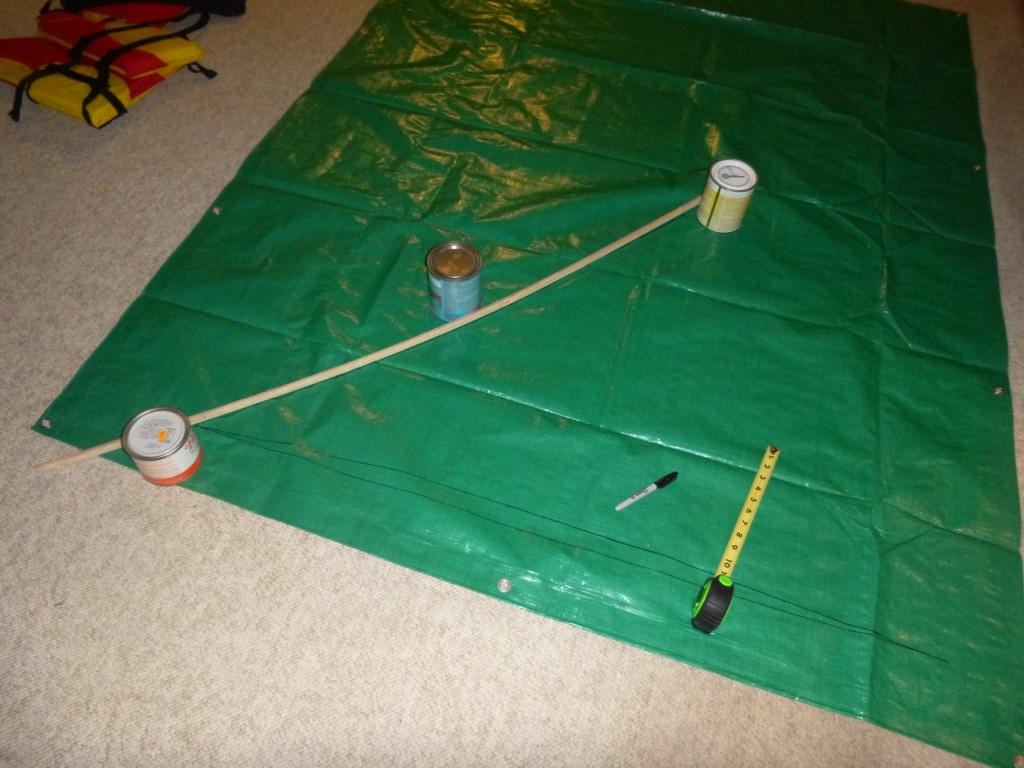
Problem 3: Sail layout. In addition to making them flat, everything I’ve read also says that a riding sail should have a hollow leech and foot to keep it from fluttering. This was a term I’d heard before but never understood until this project. It just means that the lines between the corners of the triangle aren’t straight…they’re slightly concave. After laying out the vertices on my tarp, I used some paint cans and a piece of wood trim as a spline to make a subtle curve, taking about 1.5″ out on the foot and leech. There was also the question of how to orient the weave of the fabric to best handle the load. Without doing multiple panels, I’m not really sure that there’s a right answer to this, so I just choose what seemed to be a compromise, slightly favoring the line from the clew to the luff.
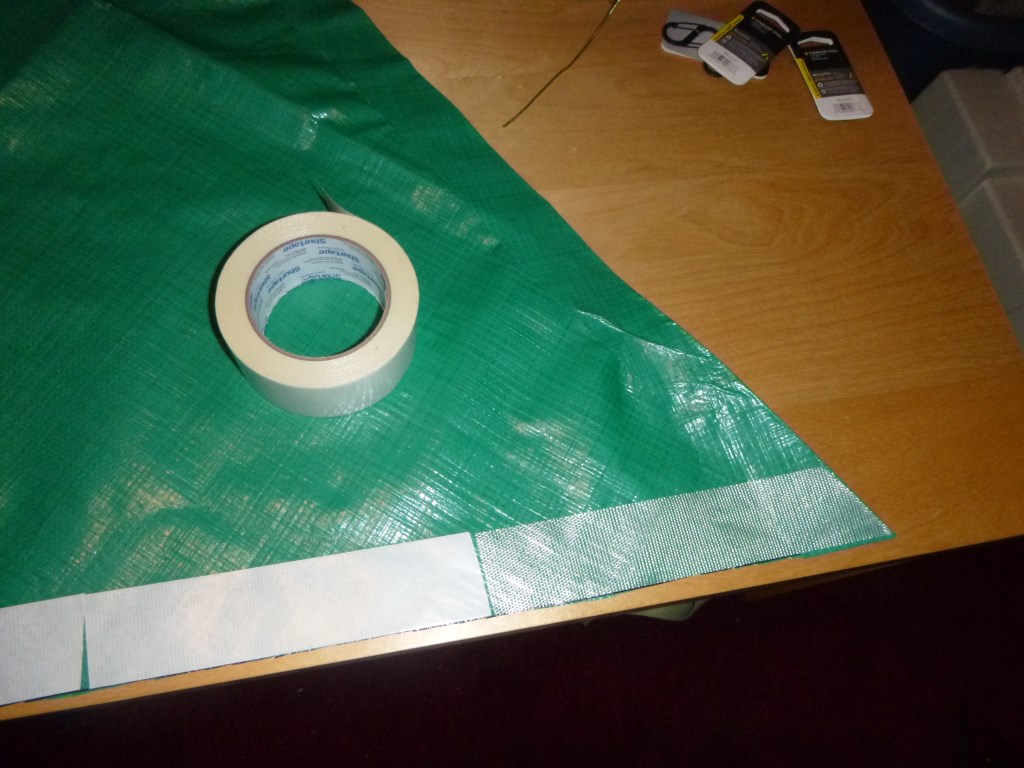
Problem 4: Making a hem. I’m not even sure if that’s the right term, but I wanted to fold over the edges of the sail and sew them down to make it a little tougher around the outside. That would be really easy if I hadn’t introduced these curves. I’m sure that there’s some old tailor’s trick for this, but it seemed impossible to me. I lined the edges with carpet tape and just did the best I could, although it’s definitely bunched in places.
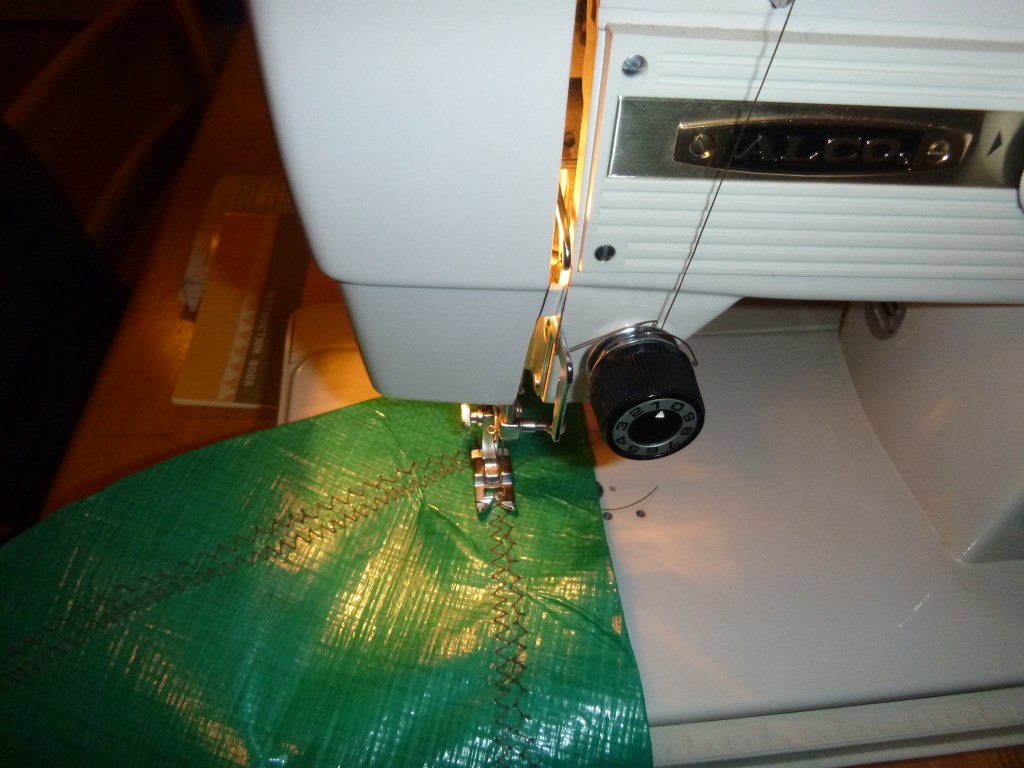
Problem 5: I don’t know how to sew. The tape wasn’t meant to be structural—it was mostly just to hold the hem there while I sewed it, which implied that I knew how to sew. I had initially considered sewing the whole thing with my Speedy Stitcher, however “speedy” is a bit of a misnomer. I love the Speedy Stitcher for what it is, but it would have been tough to complete the whole thing before I developed arthritis. Instead I borrowed my mom’s 1970 Alco sewing machine, having never used a sewing machine before, and proceeded to try to figure out how it worked.
I’m honestly not sure that I’ve ever seen a more complicated mechanical device. The top thread goes through more fairleads than all the rigging on my boat combined, and mounting the bobbin is like if Rube Goldberg had to make a set of matryoshka dolls out of props from the Iron Man movies. I can’t even picture what it’s doing with the threads.
I eventually got it though. It’s not dialed in properly, and I’m not sure it was ever really designed to go through tarp, but it certainly sewed.
Problem 6: Where do cringles come from? I needed places in this sail to connect several ropes and clips. Sails usually have grommets around the outside for this purpose, but I never really considered how they got there. It turns out that the Garbage Tool Store also sells a garbage grommet kit, including a garbage punch and die, so that you can pretend to repair their garbage tarps. Needless to say, it’s a little lacking. The tools feel like they’re made of rolled up Matchbox cars. The grommets are nearly weightless, and have all the metallurgic integrity of the MSG pack that comes in ramen noodles. I’m not sure if I’m doing it wrong or if it’s their nature, but I’m pretty sure that if I put a rope through any of these, the ragged edge on inside of the cringle would saw through it in no time. The whole kit was $3.99 though, and it will get me by as long as I put carabiners or something on all of the corners to keep it from eating line.
Eventually, I wound up with something vaguely resembling a sail.

…a very small sail. I didn’t account enough for the hem, and I possibly also measured wrong. The good news is that I have enough material to make more. I also realized late in the game that I don’t know how to start or stop sewing…there were all these weird dangling ends on both sides. I resolved this with cyanoacrylate glue, but I will assume that this is not how it’s actually done.
The best part? Out the door price: $14.72.
We’ll give it a try and see if it does anything. If it will at least set and doesn’t make any noise, it might be worth trying to do a better job on a Mk II version. Hopefully we’ll have a chance to run it up the backstay soon.
![]() Update: Check out the initial findings here.
Update: Check out the initial findings here.
Hey that pretty boat with the riding sail you’re trying to immitate looks an awful lot like mine!
ME
It's similar, but there is one subtle difference: someone is using this boat.
Oh snap! 😯
So, how did the tarp sail work? Anxious to hear as I was thinking about the same exact thing …
We haven't had a chance to try it out yet, but keep checking back—I'll be sure to post our findings as soon as we anchor out again.
Thanks for reading!
Here you go: http://sailingfortuitous.com/very_highly_fuzzy
What size is yout riding sail. Great idea.
Carl
Not sure exactly. That was a few years ago, and we don’t have that boat anymore. I think it was about 4ft on the free-flying sides and the part that attached to the backstay was a little shorter.